> ## Documentation Index
> Fetch the complete documentation index at: https://devs.surferseo.com/llms.txt
> Use this file to discover all available pages before exploring further.

# ChatGPT web

> Connect Surfer to ChatGPT in your browser and run your first request.

export const Prompt = ({text}) => {
  const copyIcon = '<svg xmlns="http://www.w3.org/2000/svg" width="16" height="16" viewBox="0 0 24 24" fill="none" stroke="currentColor" stroke-width="2" stroke-linecap="round" stroke-linejoin="round" aria-hidden="true"><rect width="14" height="14" x="8" y="8" rx="2" ry="2"></rect><path d="M4 16c-1.1 0-2-.9-2-2V4c0-1.1.9-2 2-2h10c1.1 0 2 .9 2 2"></path></svg>';
  const checkIcon = '<svg xmlns="http://www.w3.org/2000/svg" width="16" height="16" viewBox="0 0 24 24" fill="none" stroke="currentColor" stroke-width="2" stroke-linecap="round" stroke-linejoin="round" aria-hidden="true"><path d="M20 6 9 17l-5-5"></path></svg>';
  const copy = event => {
    const button = event.currentTarget;
    if (!navigator.clipboard) return;
    navigator.clipboard.writeText(text).then(() => {
      button.innerHTML = checkIcon;
      button.setAttribute('aria-label', 'Copied');
      clearTimeout(button.resetTimer);
      button.resetTimer = setTimeout(() => {
        button.innerHTML = copyIcon;
        button.setAttribute('aria-label', 'Copy prompt');
      }, 2000);
    }).catch(() => {});
  };
  return <div className="surfer-prompt not-prose">
      <div className="surfer-prompt-meta">
        <svg xmlns="http://www.w3.org/2000/svg" width="14" height="14" viewBox="0 0 24 24" fill="none" stroke="currentColor" strokeWidth="2" strokeLinecap="round" strokeLinejoin="round" aria-hidden="true">
          <path d="M19 21v-2a4 4 0 0 0-4-4H9a4 4 0 0 0-4 4v2" />
          <circle cx="12" cy="7" r="4" />
        </svg>
        <span>Prompt</span>
      </div>
      <div className="surfer-prompt-bubble">
        <p className="surfer-prompt-text">{text}</p>
        <button type="button" className="surfer-prompt-copy" aria-label="Copy prompt" onClick={copy}>
          <svg xmlns="http://www.w3.org/2000/svg" width="16" height="16" viewBox="0 0 24 24" fill="none" stroke="currentColor" strokeWidth="2" strokeLinecap="round" strokeLinejoin="round" aria-hidden="true">
            <rect width="14" height="14" x="8" y="8" rx="2" ry="2" />
            <path d="M4 16c-1.1 0-2-.9-2-2V4c0-1.1.9-2 2-2h10c1.1 0 2 .9 2 2" />
          </svg>
        </button>
      </div>
    </div>;
};

Add Surfer through ChatGPT's Plugins page with Developer mode enabled.

## Before you start

You need your own Surfer account on a [plan that includes MCP](/mcp/credits-and-limits#plans-that-include-mcp).

You also need a ChatGPT Pro, Plus, Business, Enterprise, or Education account with Developer mode available on the web. Availability can depend on your account and workspace policy; see [OpenAI's Developer mode guide](https://developers.openai.com/api/docs/guides/developer-mode).

## Connect Surfer

<Steps>
  <Step title="Turn on Developer mode">
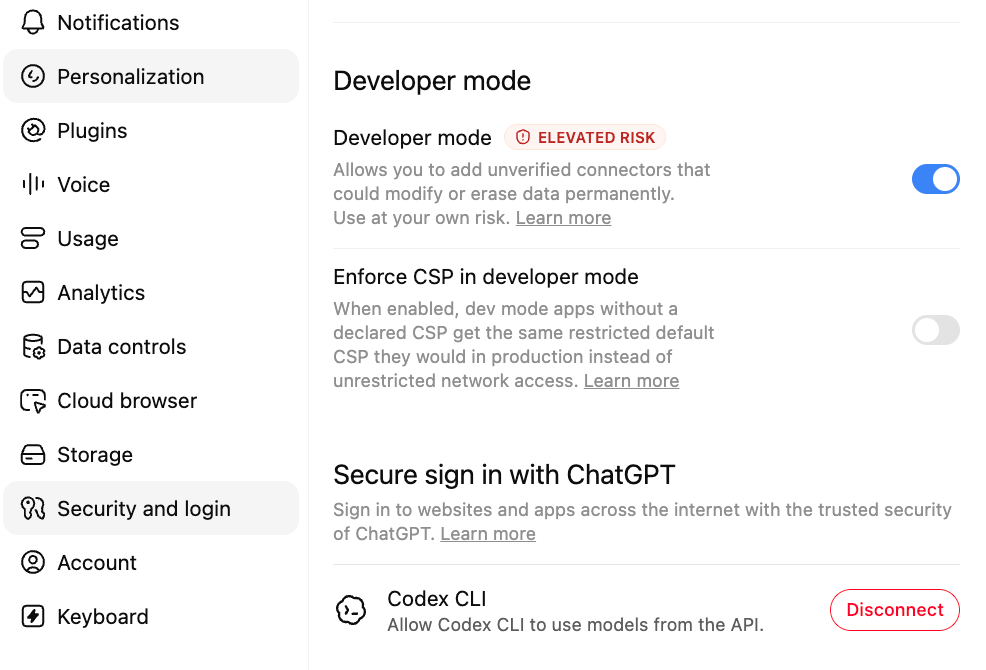
    In [ChatGPT](https://chatgpt.com), go to **Settings → Security and login → Developer mode** and turn the toggle on.

    <Frame>
      <img src="https://mintcdn.com/surfer-1a8fda11/ZwffS_UNUB-eHJT4/images/mcp/connect-chatgpt-developer-mode.png?fit=max&auto=format&n=ZwffS_UNUB-eHJT4&q=85&s=665dea97c740b97cff5c319dc2f82b69" alt="ChatGPT's Security and login settings with Developer mode enabled." width="986" height="670" data-path="images/mcp/connect-chatgpt-developer-mode.png" />
    </Frame>
  </Step>

  <Step title="Create the plugin">
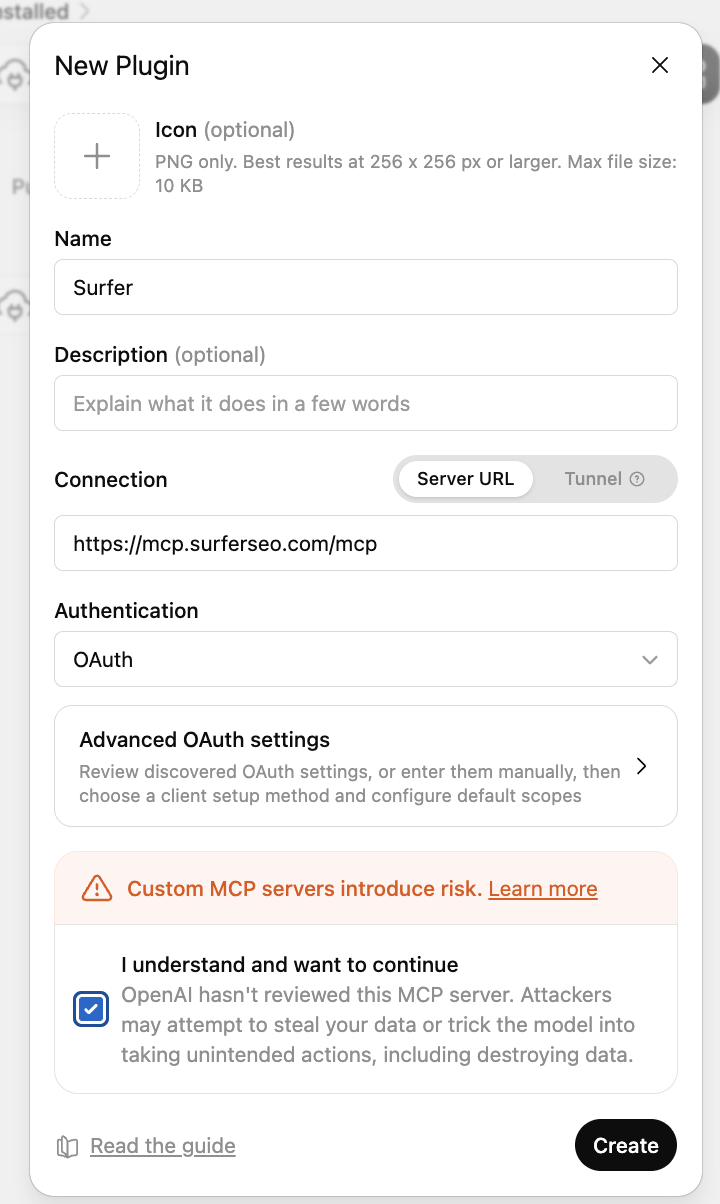
    Go to [ChatGPT Plugins](https://chatgpt.com/plugins) and select the plus button to open the **New Plugin** form. Fill in these fields:

    * **Name**: `Surfer`.
    * **Connection**: **Server URL**, with `https://mcp.surferseo.com/mcp` as the URL.
    * **Authentication**: **OAuth**.

    Select **I understand and want to continue**, then select **Create**.

    <Frame>
      <img src="https://mintcdn.com/surfer-1a8fda11/ZwffS_UNUB-eHJT4/images/mcp/connect-chatgpt-new-plugin.png?fit=max&auto=format&n=ZwffS_UNUB-eHJT4&q=85&s=0f0a1b7bbdc6e7b408acae902876eb34" alt="ChatGPT's New Plugin form with Surfer as the name, the Surfer MCP server URL, and OAuth authentication." width="720" height="1204" data-path="images/mcp/connect-chatgpt-new-plugin.png" />
    </Frame>
  </Step>

  <Step title="Open Surfer sign-in">
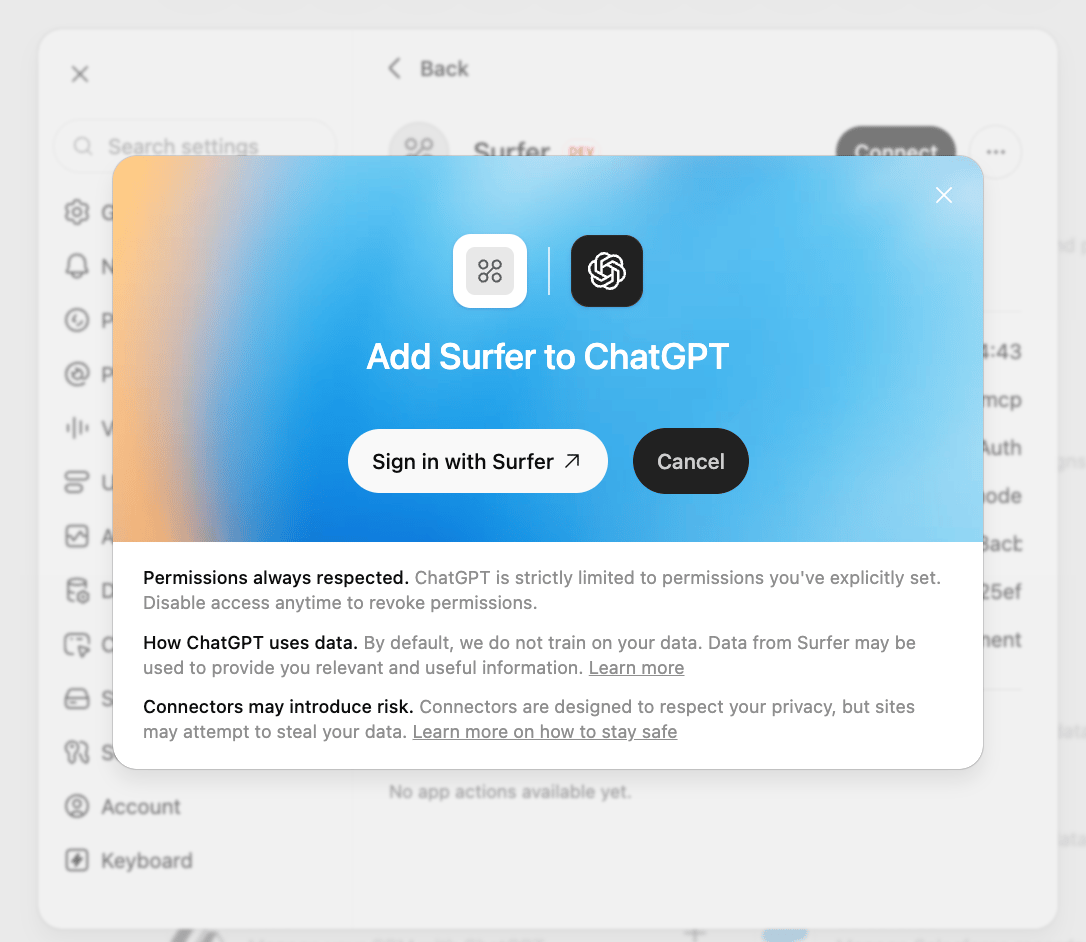
    On the plugin page, select **Connect**. In the **Add Surfer to ChatGPT** dialog, select **Sign in with Surfer**.

    <Frame>
      <img src="https://mintcdn.com/surfer-1a8fda11/ZwffS_UNUB-eHJT4/images/mcp/connect-chatgpt-sign-in.png?fit=max&auto=format&n=ZwffS_UNUB-eHJT4&q=85&s=1857e0f7357aefbcef3c8ce0a194b503" alt="The Add Surfer to ChatGPT dialog with a Sign in with Surfer button." width="1086" height="942" data-path="images/mcp/connect-chatgpt-sign-in.png" />
    </Frame>
  </Step>

  <Step title="Authorize Surfer access">
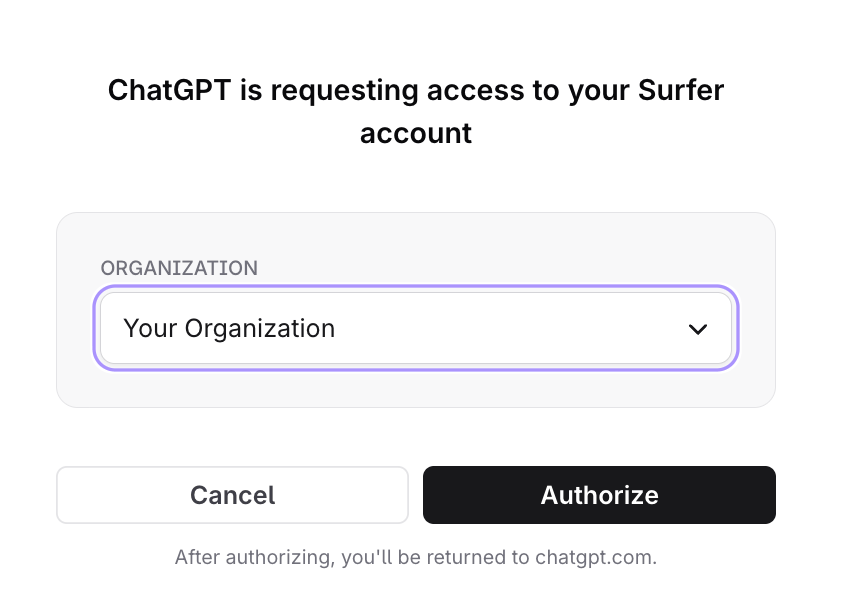
    1. Sign in with your Surfer account in the browser window that opens.
    2. Choose the organization to connect, if you belong to more than one.
    3. Select **Authorize**, then return to your client.

    If the browser signs you in to the wrong Surfer account, follow [Disconnect or switch accounts](/mcp/authentication#disconnect-or-switch-accounts).

    <Frame>
      <img src="https://mintcdn.com/surfer-1a8fda11/ZwffS_UNUB-eHJT4/images/mcp/connect-chatgpt-consent.png?fit=max&auto=format&n=ZwffS_UNUB-eHJT4&q=85&s=e4d052ab1a194c2cd4acbd7f5fe02271" alt="Surfer's consent page for ChatGPT with an organization selector and an Authorize button." width="858" height="602" data-path="images/mcp/connect-chatgpt-consent.png" />
    </Frame>
  </Step>

  <Step title="Enable Surfer in a conversation">
    Open a new chat. From the composer's **+ → Developer mode** menu, select the Surfer app for that conversation.
  </Step>
</Steps>

## Verify the connection

Ask your assistant:

<Prompt text="List my Surfer workspaces" />

Your assistant lists the workspaces in the organization you authorized. Each workspace has a name, type, location, and state. Choose an active workspace for content tasks.

Continue with [Skills](/mcp/skills) for guided workflows or [Use cases](/mcp/use-cases) for example requests. If the request fails, see [Troubleshooting](/mcp/troubleshooting).


This documentation is built and hosted on [Mintlify](https://mintlify.com), a developer documentation platform.